 谷姐靓号网
谷姐靓号网记录一下使用过程。
Update 2020.4.23 Google Drive现引入了快捷方式的文件管理方式,针对这种文件管理方式,我们可以使用folder id直接进行资源的拷贝而不用去像之前一样先将资源手动添加到我的网盘!
Update 2019.5.30 一些其他玩法 (这是倒序,欢迎交流)
1. 如果要配置300个账号怎么弄呢?为了方便,可以在 Windows 主机上用下面的脚本进行配置,后面配置文件 rclone.conf 复制到别的地方也可以用。
for /L %%G in (1,1,300) do rclone config create c%%G drive --drive-client-id "xxx.apps.googleusercontent.com" --drive-client-secret "yyy" --drive-team-drive zzz配置文件的位置可以输入命令
rclone config file获得
2. 手上有 rclone.conf 文件,想从普通盘换到团队盘: 直接修改 rclone 的配置文件,给对应的盘加上
team_drive = YourTeamdriveID。同理换成别的团队盘直接修改 YourTeamdriveID 即可。
3. 为了更快完成任务,想将官方的 client id 换成自己的:直接在配置文件加
client_id = YourClientID和client_secret = YourClientSecret两行。但是 token 还需再登陆认证来刷新一下...
Rclone安装和配置记录如下:
目录
Step 1. 安装Rclone
Linux环境
curl https://rclone.org/install.sh | sudo bash
Windows环境
直接去Rclone官网下载Rclone,然后最好将rclone.exe所在目录加入系统环境变量
Step 2. 参照官方安装指南,配置Rclone
rclone configNo remotes found - make a new one
n) New remote
s) Set configuration password
q) Quit config
e/n/d/r/c/s/q>
2. 输入 n,并给新的远程配置起一个名字
ncody_gd1Type of storage to configure.
Enter a string value. Press Enter for the default ("").
Choose a number from below, or type in your own value
1 / A stackable unification remote, which can appear to merge the contents of several remotes
\ "union"
2 / Alias for a existing remote
\ "alias"
3 / Amazon Drive
\ "amazon cloud drive"
4 / Amazon S3 Compliant Storage Provider (AWS, Alibaba, Ceph, Digital Ocean, Dreamhost, IBM COS, Minio, etc)
\ "s3"
5 / Backblaze B2
\ "b2"
6 / Box
\ "box"
7 / Cache a remote
\ "cache"
8 / Dropbox
\ "dropbox"
9 / Encrypt/Decrypt a remote
\ "crypt"
10 / FTP Connection
\ "ftp"
11 / Google Cloud Storage (this is not Google Drive)
\ "google cloud storage"
12 / Google Drive
\ "drive"
13 / Hubic
\ "hubic"
14 / JottaCloud
\ "jottacloud"
15 / Local Disk
\ "local"
16 / Mega
\ "mega"
17 / Microsoft Azure Blob Storage
\ "azureblob"
18 / Microsoft OneDrive
\ "onedrive"
19 / OpenDrive
\ "opendrive"
20 / Openstack Swift (Rackspace Cloud Files, Memset Memstore, OVH)
\ "swift"
21 / Pcloud
\ "pcloud"
22 / QingCloud Object Storage
\ "qingstor"
23 / SSH/SFTP Connection
\ "sftp"
24 / Webdav
\ "webdav"
25 / Yandex Disk
\ "yandex"
26 / http Connection
\ "http"
Storage>
3. 选择 Google Drive,这里是输入数字 12(别的版本的rclone中Google Drive可能对应不同的数字)
12See help for drive backend at: https://rclone.org/drive/
Google Application Client Id
Leave blank normally.
Enter a string value. Press Enter for the default ("").
4. 用 rclone 的 client_id,直接回车
回车Google Application Client Secret
Setting your own is recommended.
Enter a string value. Press Enter for the default ("").
5. 用 rclone 的 client_secret,直接回车+1
回车Scope that rclone should use when requesting access from drive.
Enter a string value. Press Enter for the default ("").
Choose a number from below, or type in your own value
1 / Full access all files, excluding Application Data Folder.
\ "drive"
2 / Read-only access to file metadata and file contents.
\ "drive.readonly"
/ Access to files created by rclone only.
3 | These are visible in the drive website.
| File authorization is revoked when the user deauthorizes the app.
\ "drive.file"
/ Allows read and write access to the Application Data folder.
4 | This is not visible in the drive website.
\ "drive.appfolder"
/ Allows read-only access to file metadata but
5 | does not allow any access to read or download file content.
\ "drive.metadata.readonly"
scope>
6. 直接回车+2
回车ID of the root folder
Leave blank normally.
Fill in to access "Computers" folders. (see docs).
Enter a string value. Press Enter for the default ("").
root_folder_id>
7. 直接回车+3
回车Service Account Credentials JSON file path
Leave blank normally.
Needed only if you want use SA instead of interactive login.
Enter a string value. Press Enter for the default ("").
service_account_file>
8. 直接回车+4
回车Service Account Credentials JSON file path
Leave blank normally.
Needed only if you want use SA instead of interactive login.
Enter a string value. Press Enter for the default ("").
service_account_file>
Edit advanced config? (y/n)
y) Yes
n) No
y/n>
9. 不编辑高级设置,输入 n
nRemote config
Use auto config?
* Say Y if not sure
* Say N if you are working on a remote or headless machine
y) Yes
n) No
y/n>
10. 输入 n(如果是本地安装了浏览器的电脑可以输入y)
nIf your browser doesn't open automatically go to the following link: https://accounts.google.com/o/oauth2/auth?access_type=offline&client_id=202264815744.apps.googleusercontent.com&redirect_uri=urn%3Aietf%3Awg%3Aoauth%3A2.0%3Aoob&response_type=code&scope=https%3A%2F%2Fwww.googleapis.com%2Fauth%2Fdrive&state=a5409d63a4b6d0063b3e1bf1336261eb
Log in and authorize rclone for access
Enter verification code>
11. 复制上链接到浏览器,获得如下形式的 verification code(如果上面步骤10选了y,会自动打开浏览器,根据提示登陆账号验证即可)
4/fAFDoVQlYzfEsHo0jjWSxXiINSID21yKS3M51hNFeNuH2gyc7t1ebR4Configure this as a team drive?
y) Yes
n) No
y/n>
12. 输入n(如果是团队盘输入y)
n--------------------
[cody_gd1] type = drive
token = {"access_token":"ya29.Gls7B3xW0QneoaH-BKfvbsIJCe7IQuR9Qxq3IHisgSmRfNLhB1o52O2SuY31Lu2VCjr5mX5FIz0cklE5iG16sybT0uY5PPYGI6n6YjZ5xSCGfgV85aSMi8M0aRlk","token_type":"Bearer","refresh_token":"1/ck-ig6X4lf7ql3eX0bqH3ZB0HHpGAccRdGUpf4rV80Y","expiry":"2019-07-05T02:24:16.733118566+08:00"}
--------------------
y) Yes this is OK
e) Edit this remote
d) Delete this remote
y/e/d>
13. 输入y
yCurrent remotes:
Name Type
==== ====
cody_gd1 drive
e) Edit existing remote
n) New remote
d) Delete remote
r) Rename remote
c) Copy remote
s) Set configuration password
q) Quit config
e/n/d/r/c/s/q>
14. 输入q
q15. 再检查配置
输入rclone lsd cody_gd1:
-1 2018-09-13 20:18:10 -1 Colab Notebooks
-1 2017-12-25 20:05:27 -1 Google Photos
-1 2018-02-16 14:27:57 -1 IFTTT
-1 2018-02-05 01:00:06 -1 Music
-1 2018-11-13 11:15:12 -1 周杰伦全集
-1 2018-10-16 15:03:37 -1 王菲合集
https://drive.google.com/drive/folders/1PnJ-W090lxAYUV8cSqCveARzjxnxwocm
可以添加
--drive-root-folder-id参数,做如下的检查
rclone ls --drive-root-folder-id 1PnJ-W090lxAYUV8cSqCveARzjxnxwocm cody_gd1:
Step 3. 开始copy
输入
rclone copy -P cody_gd1:周杰伦全集 cody_gd1:周杰伦全集_copy
将别人共享的“周杰伦全集”复制一份为“周杰伦全集_copy”
经过漫长的等待,终于拷贝完成。
rclone config file可以找到配置文件的所在位置)
将红框1的配置(即对应于步骤2你所完成的配置cody_gd1)复制一份成红框2
1. 配置名改名为cody_gd0
2. 如果你在Step. 2的交互过程中配置成了团队盘(对应第12步),那么cody_gd1配置文件中会多出team_drive的行,我们在cody_gd0部分将其删除 带上team_drive这行也不影响
3. 加上root_folder_id参数,参数的值写成别人的分享链接id
然后进行
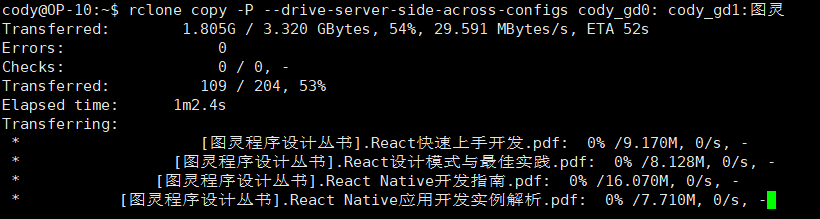
rclone copy -P --drive-server-side-across-configs cody_gd0: cody_gd1:你的文件夹名字
配置文件路径/home/cody/.config/rclone/rclone.conf

用folder id拷贝的过程(如果没有反应请检查cmd受否翻墙,或者将拷贝参数-P改为-vv以查看具体报错信息)
Step 4. 校验
检查拷贝是否完全
rclone check cody_gd1:周杰伦全集 cody_gd1:周杰伦全集_copy
又经过漫长的等待:
2019/07/05 01:52:36 NOTICE: Google drive root 'cody_gd1:周杰伦全集_copy': 0 differences found
2019/07/05 01:52:36 NOTICE: Google drive root 'cody_gd1:周杰伦全集_copy': 1024 matching files
拷贝完全。
rclone check cody_gd0: cody_gd1:你的文件夹
后记
后记丢失 ==大写的尴尬== 后续补充
2. 输入
rclone config file可以查看生成的最终配置文件所在位置,可以用编辑器打开,可以对一些键值直接修改3. 如果rclone check太慢,可以分别对src和dst运行rclone size
4. 上拷贝过程是调用Google Drive的API(server side copy),真实的拷贝是直接在Google的服务器完成的,所以并不会消耗我们自己的流量
5. Google那边对API调用有限制,用rclone拷贝每个Google账号每24小时只能拷贝750G,如果超过了此限制,24小时之后可接着拷贝,新的拷贝任务中Rclone会自动跳过已拷贝的部分。想跳过这个750G的限制可以用多个账号往TeamDrive/Shared Drive里面拷贝,也可以用Service Accounts来完成这样的过程,相关的工具有Folderclone(纯Python调用Google Drive API),AutoRclone(用Python调用Rclone),gclone(Rclone的魔改版)


分享链接copy 的,按照你step2,3做的,能是能拷贝,就是它把我所有shared with me的文件都拷到团队盘了,而且不会中断,拷完过了100%,大小还一直再加,拷贝也不停止,强行停止检查发现早就拷完了..也不知道什么bug
这里只考虑了分享文件/文件夹,怎么会和shared with me有关系了?你是复制错了folder id么?
那个体积一直增加这和步骤没关系吧?或许只是意外,记得之前看到有人碰到过,不知你那还能复现不?
搞了半天我也记不清开始复制的ID是我进与我共享复制的还是链接的id了?,不过后面仔细按你的步骤做了下,没有问题的,特来回复防止误导后面的朋友。博主教程很棒?
请问为啥复制不了文件夹的目录啊,只能把所有单个文件转存过去,这样要分类好难搞啊,哭。。
不好意思,才看到,不知道解决没?
满满的干货,学习一下